Computerized Universal Testing Machines Manufacturer
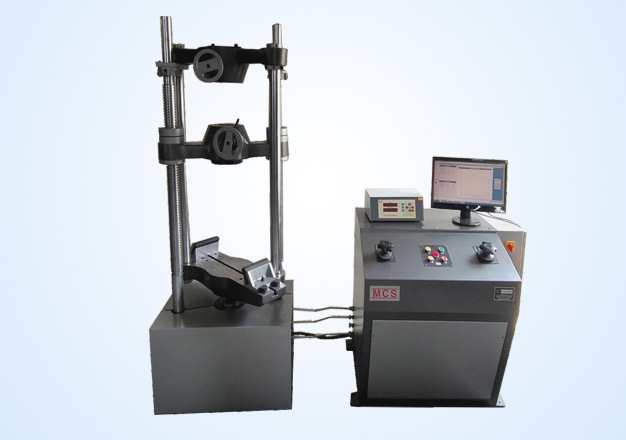
We manufacture computerized universal testing machines for all industries. These machines are highly result oriented and long lasting.
Features :
- Loading accuracy as high as ± 1%
- Servo control operation for load/strain rate control
- Manual as well as computerized control
- High temperature testing up to 1200 °C.
- Conforms to IS:1828, ASTM E8 Standards
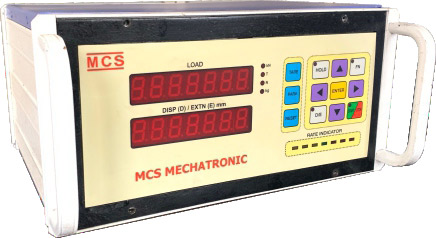
The Controller MCS-MC01
- Latest flash micro controller with High speed data sampling
- Built in real time clock for date and time
- In built 4 channel data acquisition, expandable to 8 channel
- Load measurement using high precision pressure cell.
- 24 bit multiplexed ADC with 1/ 100000 counts for load.
- Displacement measurement by rotary encoder, Resolution 0.01mm
- Digital display of Load, Displacement, Extension, speed, Time
- Auto calibration for load, displacement and extension.
- Closed loop PID mechanism for precise load rate control.
- Stand alone machine operation from keyboard without computer
- Stepper motor/ servo valve interface for load/ strain rate control
- Sealed membrane keypad for data entry and running the test.
- In built 232/ USB port for real time data transfer to computer.
- Memory for storage of calibration factors & machine settings.
- Over load, over travel protection for all types of testing needs
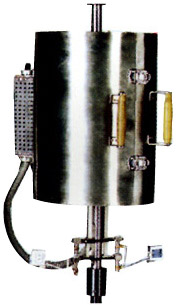
Model: MCS-UTE

- Furnace made of SS304 material
- Vertical split type design
- Single or Three zone model
- Close loop PID controller
- Temperature range (°C) 150-1200
- Temperature gradient 1 degree
- Temperature Error ± 2 degree
- Use of K type thermocouple
Extensometer Technical Data
MODEL |
Unit |
UTE-10 |
UTE-20 |
UTE-40 |
UTE-60 |
UTE-100 |
UTE-200 |
| Measuring capacity | (kN) |
100 |
200 |
400 |
600 |
1000 |
2000 |
| Measuring range | (kN) |
0-100 |
0-200 |
0-400 |
0-600 |
0-1000 |
0-2000 |
| Load Resolution | (N) |
10 |
20 |
40 |
60 |
100 |
200 |
| Load range with Accuracy of measurement ± 1% | (kN) |
2 to 100 |
4 to 200 |
8 to 400 |
12 to 600 |
20 to 1000 |
40 to 2000 |
| Resolution of piston movement (Displacement) | (mm) |
0.1 |
0.1 |
0.1 |
0.1 |
0.1 |
0.1 |
| Clearance for tensile at fully descended working piston | (mm) |
50 to 700 |
50 to 700 |
50 to 700 |
50 to 800 |
50 to 850 |
50 to 900 |
| Clearance for compression test at fully descended working piston | (mm) |
0-700 |
0-700 |
0-700 |
0-800 |
0-850 |
0-900 |
| Clearance between columns | (mm) |
500 |
500 |
500 |
600 |
750 |
850 |
| Ram stroke | (mm) |
150 |
200 |
200 |
250 |
250 |
300 |
| Straining/Piston speed (at no load) | (mm/min) |
0 - 300 |
0 - 150 |
0 -150 |
0 - 100 |
0 - 80 |
0 - 45 |
| Power | kW |
1.0 |
1.0 |
1.7 |
1.9 |
2.6 |
4.9 |
| Voltage | V |
400 -440 |
400 -440 |
400 -440 |
400 -440 |
400 -440 |
400 -440 |
| Phase | 0 |
3 |
3 |
3 |
3 |
3 |
3 |
| Machine dimensions (Approx.- L x W x H) | (mm) |
2032x750x1960 |
2032x750x1960 |
2060x750x2180 |
2265x750x2534 |
2415x815x2900 |
3000x1200x3000 |
| Machine Weight (Approx) | kg |
1500 |
1500 |
2500 |
3500 |
5500 |
9500 |
Standard Accessories |
|||||||
| Tensile test - Clamping jaw for Round specimens of diameter |
(mm) |
10 - 20 20 - 30 |
10 - 20 20 - 30 |
10 - 25 25 - 40 |
10 - 25 25 - 40 40 - 55 |
10 - 25 25 - 45 45 - 70 |
20 - 40 40 - 60 60 - 80 |
| Tensile test - Clamping jaw for flat specimen Thickness Width |
(mm) (mm) |
0-10 10 - 20 - 50 |
0-10 10 - 20 - 50 |
0-15 15 - 30 - 65 |
0-15 15 - 30 - 70 |
0-22 22 - 44 44 - 65 70 |
0-20 20 - 45 45 - 70 90 |
| Compression- Pair of Compression plates of diameter |
(mm) |
120 |
120 |
120 |
120 |
160 |
220 |
| Transverse test Table with adjustable rollers width of roller |
(mm) |
160 |
160 |
160 |
160 |
160 |
200 |
| Diameter of roller | (mm) |
30 |
30 |
30 |
50 |
50 |
70 |
| Maximum clearance between supports | (mm) |
500 |
500 |
500 |
600 |
800 |
900 |
| Radius of punch tops | (mm) |
6, 12 |
6, 12 |
12, 16 |
16, 22 |
16, 22 |
30, 40 |


Test Conducted With Electronic Extensometer MCE-2